


Table of Contents
ToggleFleas are one of the most persistent home invaders, and they multiply fast. A single female flea can lay hundreds of eggs, turning a small problem into a full-blown infestation in weeks. Whether you’ve got pets or discovered fleas through other means, effective flea control for your house requires a multi-step approach that tackles both the insects and their life cycle. This guide walks you through the practical steps to reclaim your home, from understanding the problem to implementing treatments and prevention strategies that actually work.
Key Takeaways
- Fleas complete their life cycle in as little as two weeks, so flea control for your house requires a multi-step approach targeting all life stages, not just spot treatments.
- Preparation is essential: declutter thoroughly, wash all pet bedding in hot water (at least 140°F), and vacuum slowly every 2–3 days for at least two weeks to break the flea cycle.
- Combine mechanical removal with treatment options like steam cleaning (160°F or higher), food-grade diatomaceous earth, or pet-safe home sprays, depending on infestation severity.
- If DIY efforts show no improvement after two weeks, professional pest control may be necessary; expect follow-up visits 10–14 days after initial treatment to catch newly emerging fleas.
- Prevent future infestations by maintaining year-round pet prevention, vacuuming weekly, sealing cracks in baseboards, keeping indoor humidity below 50%, and acting immediately at the first sign of fleas.
Understanding The Flea Problem In Your Home
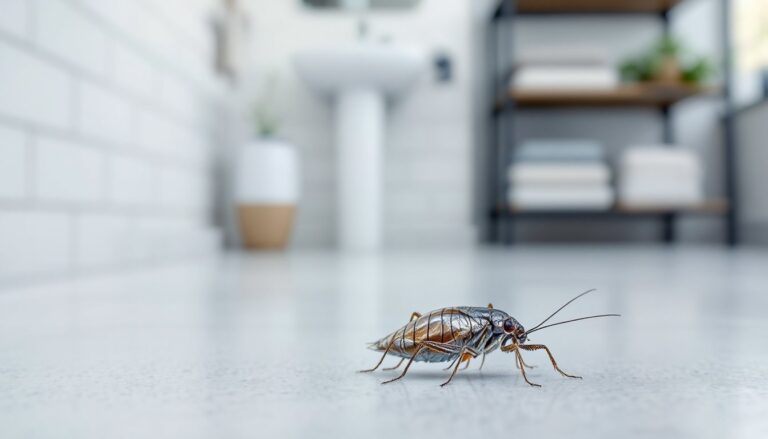
Fleas aren’t just a pet problem, they infest carpets, furniture, bedding, and even cracks in hardwood floors. If you’re dealing with household pests like silverfish in house or centipedes in house, you might already know how quickly unwanted insects spread. Fleas operate on a lifecycle: eggs hatch into larvae, larvae pupate, and adults emerge ready to bite. The entire cycle can take as little as two weeks under ideal conditions (warm, humid environments), which is why spot treatment rarely works.
Before you treat anything, confirm you actually have fleas. Look for tiny dark specks (flea dirt) on your pet’s skin, your furniture, or carpeting. You might also notice bite patterns on your ankles or legs. If you see jumping insects about the size of a pinhead, that’s your confirmation. Some homeowners mistake other small pests for fleas, so positive identification saves time and money.
Preparing Your Home For Flea Treatment
Jumping straight into treatment without prep work is like painting over dirty drywall, you’ll waste time and money. Preparation is where most successful flea control starts, and it’s non-negotiable.
Decluttering And Deep Cleaning
Fleas hide in clutter and thrive in undisturbed spaces. Start by removing items from the floor: toys, laundry baskets, pet bedding, and anything piled in corners. Wash all pet bedding, blankets, and cushion covers in hot water (at least 140°F). Fleas die in sustained heat, so don’t skip this step.
Next, declutter ruthlessly. Move furniture away from walls so you can access baseboards and carpet edges. Remove stack of magazines, old boxes, and anything stored under beds or closets, these are flea safe zones. Discard items you don’t need: keep the rest in sealed containers off the floor.
Once the space is clear, vacuum thoroughly. Use a standard household vacuum with strong suction, working slowly across every carpeted area, under furniture, and along edges. Pay special attention to where pets sleep and spend time. Empty the vacuum outside immediately after, don’t just tip it into your trash can indoors. For households using natural methods, research shows that natural home pest control can complement mechanical removal. After vacuuming, mop hard floors with soapy water to disrupt eggs and larvae that might’ve escaped the vacuum.
DIY Methods For Flea Control
Once your home is prepped, you have several DIY options. The right choice depends on infestation severity and whether you’re comfortable using chemical treatments.
Vacuuming And Washing Strategies
Vacuuming is your first-line mechanical defense. Repeat vacuuming every 2–3 days for at least two weeks. Why so often? Flea pupae are in a cocoon-like stage that vacuuming can’t penetrate, so you’re targeting newly emerged adults and larvae before they pupate. This breaks the cycle.
Wash affected areas again with hot soapy water. For furniture, use a steam cleaner at 160°F or higher if available: heat kills fleas at all life stages. If you don’t own a steamer, rental services are inexpensive and available at most hardware stores.
Beyond mechanical removal, you have treatment options. Diatomaceous earth (food-grade) is a powder that damages flea exoskeletons. Sprinkle it lightly on carpets and furniture, let it sit for 24–48 hours, then vacuum thoroughly. Wear a dust mask when applying, fine particles irritate lungs. This method works for mild infestations but takes patience.
Flea foggers (pesticide aerosols) clear a room quickly but require you to seal the space for 2–4 hours and vacate. They’re more aggressive and cover larger areas than spot treatments. Follow label instructions exactly: these products contain insecticides that can be harmful if misused.
For households with pets, household flea treatment options include sprays and powders designed for homes, not just animals. Products like Knockout Area Treatments or generic permethrin-based sprays are applied to carpet and upholstery. Again, always follow directions, wear gloves, and keep pets and children away during application and drying time. Some homeowners prefer starting with gentler methods: research suggests this flea pest control cost article helps budget for options.
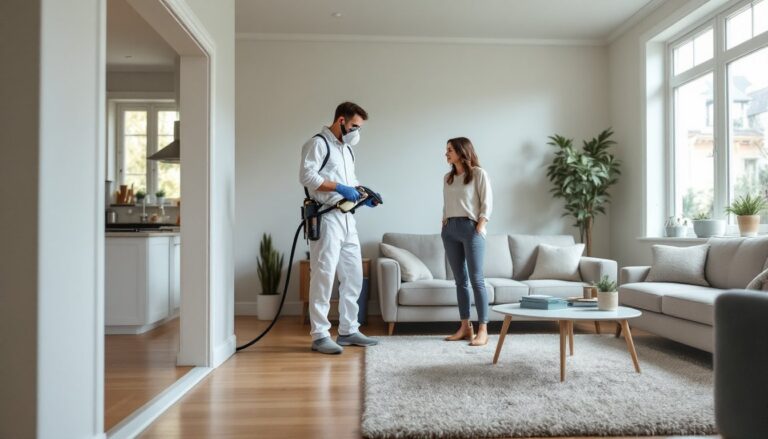
When To Consider Professional Treatment
If you’ve vacuumed, washed, and treated for two weeks without improvement, call a pest control professional. Widespread infestations, or cases where you suspect fleas in walls or attics, need trained eyes and professional-grade equipment.
Professional exterminators use stronger insecticides and methods (heat treatments, whole-house spraying) that aren’t available to homeowners. They also understand building codes and ventilation requirements. If you’re in a rental, contact your landlord first, many leases require professional treatment, and costs may be covered.
Expect to pay for an inspection and treatment plan. Costs vary by region and severity, but budget accordingly. A single treatment rarely solves the problem: most professionals recommend follow-up visits 10–14 days later to catch newly emerging fleas. This two-visit approach is standard because one application can’t kill pupae that haven’t yet emerged.
Preventing Future Flea Infestations
Once fleas are gone, prevention becomes your focus. Pet owners know this well: year-round flea prevention on pets (collars, topicals, oral medications) is the easiest defense. Talk to your vet about options, modern preventatives are safer and more effective than older generations.
For your home, maintain the habits that got you here. Vacuum weekly, wash pet bedding regularly, and declutter to eliminate hiding spots. Seal cracks in baseboards and hardwood floors with caulk. Fleas need warmth and humidity: keep indoor humidity below 50% if possible, and maintain good air circulation.
If you bring in used furniture or items, inspect them carefully or treat them before bringing them indoors. Secondhand couches and rugs are common flea sources. When traveling with pets, check thoroughly afterward, fleas can hitch rides on clothing and luggage.
Stay vigilant. The moment you spot a flea or suspicious bite, act fast. Early intervention prevents another infestation. Resources like Bob Vila and The Spruce offer detailed guides on home maintenance and pest prevention strategies. Real Simple has practical decluttering tips to reduce hiding spots. A combination of pet prevention, regular cleaning, and quick response to early signs keeps your home flea-free.